Are you captivated by the thought of walking amongst the old-growth Redwoods (the world’s tallest trees) of Redwood National Park? For 14 years, I’ve been dreaming – no, yearning – to immerse myself amidst the old-growth forests of Coastal Northern California. That dream finally became a reality with an unforgettable 12-day car camping adventure through Redwood National Park campgrounds, Prairie Creek Redwoods State Park, Del Norte Coast Redwoods State Park, and Jedediah Smith Redwoods State Park.
In this guide, I’ll share details from planning insights to essential planning and packing tips, and even a peek into my favorite gear and new items I’m excited to test.
Whether you’re mapping out your own Redwood adventure, in need of planning pointers, or looking for top-notch gear recommendations, you’re in the right place.
Let’s dive in and get ready to discover the wonders of the Redwood State and National Parks together!
*Please note: This post may contain affiliate links. Any affiliate commission and ad revenue I receive helps me keep this tool and blog going. Thank you!

Foundation For Planning A Redwood National Park Campground Road Trip
Over the years, I’ve discovered the level of planning I need to feel confident heading into my adventures. I’ve determined there are three types of planners:
- Planning every hour of your trip: For some trips, meticulous planning is essential. If I’m going to a new destination and have limited time, I prefer having most of my time planned out to make the most of the experience.
- Winging It: On the other hand, when I’m familiar with a place, I might embrace spontaneity and wing most of the trip, allowing room for unexpected discoveries.
- Somewhere in between: For most of my adventures, including this one to Redwood National Park, I fall somewhere in between. I need to remove any anxiety by booking a place to sleep, be it a campsite or a hotel.
For camping and road trips, securing a campsite is crucial for me. While camping offers flexibility, pre-booking a site in advance provides peace of mind. I’ll often leave room for spontaneity and check out first-come, first-serve sites for more desirable locations. If there’s a spot available, I will book it on arrival and cancel (or giveaway) my pre-booked site.
I also like to have a few must-do hikes or activities planned for specific days—ones that require permits or reservations. On other days, I embrace spontaneity, exploring recommendations from rangers at the visitor center, camp hosts, and fellow adventurers. I also keep a list of potential activities as references if needed.
For this Redwood National Park campground road trip, I balanced my itinerary, planning approximately 50% of the day’s activities and leaving the rest open to decide on the fly.
Note For Beginners:
If you’re new to camping or a beginner in outdoor adventures, I recommend planning about 75% of your itinerary. A relatively full itinerary can help you navigate the trip smoothly as you become familiar with the camp setup and the camping experience. Leaving 25% of your itinerary free allows room for flexibility and accounts for any unexpected situations that may arise.
Goals For My Adventure Into The Redwood Forests
To successfully plan an adventure, I start by setting clear goals. My goals will not only guide my activity selection but also influence the order in which you arrange them in your itinerary. Typically, I categorize my goals into two types:
- Primary goals: These are your non-negotiables—the things you consider crucial for the trip to be deemed successful.
- Secondary goals: These are nice-to-haves. While you’d love to achieve them, not managing to do so won’t impact your view on the success of the adventure.
Here’s a look at the goals I set for my adventure to the Northern California Redwood National Parks and California State Parks:
Primary Goals
-
- Mental Refresh: This is usually the main goal of most of my adventures. Escaping from the daily grind allows me to reset and rejuvenate. To accomplish this, I plan trips that maximize my time off-grid and prepare thoroughly to ensure a worry-free experience.
- Viewing of Old-Growth Redwoods: My aim was to fit in as much hiking as possible to fully appreciate these old-growth forests.
- Camp Cooking: At home cooking, I use cooking as a way to unwind from the workday. I set a goal for this trip to explore campfire cooking, to see if I can find the same joy in cooking after a day of adventure.

Secondary Goals
-
- Surfing: I’ve been an avid surfer for the past few years, so I hoped to fit in a few sessions during this trip. I bought a book of surf spots in the area so I could know the spots to look for when I was exploring.
- Fly Fishing: I have been fly-fishing since I was a teenager and try to incorporate it into many of my adventures. Going into this trip I knew the fishing opportunities may be limited given the snow California had this year and rivers may have too much water to be fishable therefore I made it a secondary goal.

Determining The Best Time Of Year To Explore The Coastal Redwood Trees
When planning your adventure, consider the time of year carefully. If you already have a destination in mind, researching the historic weather for that area will help you determine the best timing for your trip and ensure you pack appropriately. On the other hand, if you have a specific time of year in mind, researching the historic weather can help you choose the perfect adventure destination.
While Redwood National Park and Redwood State Parks are open year-round, the best times of year to visit the parks are late spring (May into early June) and early fall (September into early October). During both periods, you can expect milder weather and fewer crowds—a significant advantage for planning a more serene adventure. In late spring, there may be more days with a lingering marine layer, but the landscape should be lush and green. Early fall offers more sunny days.
When I was planning my road trip to explore the Redwood National Park Campgrounds in December 2022, fall seemed too far away to wait, so I opted for a spring trip (May 13th to May 24th). Campsite availability helped influence the specific dates, but more on that in the next section.
Determining The Best Redwood National Park Campgrounds
Finding campsite accommodation can be challenging because campsites at popular parks can be booked months in advance. An additional complication for this trip is I wanted to change campsites multiple times over the 12 days. This means I need to find multiple Redwood National Park campgrounds that have availability between May 13, 2023 and May 24, 2023. Here is how I approached booking campsites as well as some of the websites I used to research in the process:
Ideal Routes
Given the Redwood National Park campgrounds are located in counties of Del Norte (borders Oregon), Humboldt, and Mendocino, listed north to south, I had to determine if I wanted to camp my way up or down the Coast. Starting my trip from San Diego, about 700 miles or 15ish hours from Oregon, I chose to start north and make my way down, lightening the return trip.
Gold Bluffs Beach Campground
Years ago I stumbled across photos and a hike description of Fern Canyon that I couldn’t get out of my head. This hike could be accessed multiple ways including a trailhead at Gold Bluffs Beach Campground. This was a must-do for me, so a campsite here was one of the first things I looked to book. It’s part of Prairie Creek Redwoods State Park, which was about halfway through my adventure. Luckily for me, this campground had a good amount of availability.

Memorial Day Weekend
Holiday weekends tend to be a hard time for booking campsites as your fellow adventurers like to take advantage of the long weekend by adding a few of their own personal vacation days to one side of the weekend or the other. Memorial Day falls at the end of May, so I knew it was going to be tough to book sites as I got closer.
Booking sites
I focused on campsites within and around the Redwood National or State Parks, managed by the California Department of Parks and Recreation. Although slightly pricier (some sites reached $50/night after fees), I believe their proximity to hiking trails and attractions are worth the premium. All my reservations were made via the Reserve California website. Reserve California is the official reservation platform for the California Department of Parks and Recreation. It provides campers and outdoor enthusiasts with an easy and convenient way to reserve campsites at all California State Parks. For alternative booking options, consider:
-
- National Park Service (NPS)
- While you can’t book directly, this official U.S. National Park Service site provides extensive national park and campground information.
- Recreation.gov
- A trusted platform for reservations on federal lands (like National Parks), it offers campground details, site maps, reviews, and amenity information.
- ReserveAmerica
- A leading reservation service, it lists thousands of campgrounds with detailed information.
- U.S. Forest Service (FS)
- This official site provides insights into national forests and grasslands, from campground details to dispersed camping guidelines.
- Campendium
- A go-to for campground reviews, it covers a wide range, from established parks to boondocking sites.
- Hipcamp
- A unique platform that offers diverse camping experiences, from traditional to unconventional settings. These camping experiences tend to be on privately owned land and booked directly with the land owner.
- The Dyrt
- Rapidly growing in popularity, it’s a comprehensive platform for campground reviews and bookings.
- For more details on the websites listed above, check out this blog post, Book A Campsite: The Ultimate Website Guide.
- National Park Service (NPS)
Other Things to Look For
When selecting a campsite, consider the following:
-
- Amenities: Depending on your needs, you might prefer to look for more developed campgrounds with sites that come with picnic tables, food lockers, fire rings/fire pits, or campground facilities like hot showers, flush toilets, and potable water. Some campsites even offer electrical hookups for RVs or charging stations for devices.
- Size and Limitations: Ensure the site can accommodate your tent, RV, or other equipment. Some sites have restrictions on the number of tents or vehicles.
- Location: Proximity to attractions or trails might be a priority, but also consider the setting – would you prefer a lakeside view, a spot amidst tall pines, or perhaps a secluded nook?
- Safety: Check if the campsite is in an area prone to wildlife encounters, flooding, or other potential hazards. Familiarize yourself with safety guidelines for the area.
- Reviews and Recommendations: Sometimes the best advice comes from fellow travelers. Reading reviews can provide insights into the best spots within a campground or any unforeseen challenges.
- Fire Restrictions: Not all campgrounds allow campfires. This can be for a number of reasons including but not limited to high wildfire risk in the area, local environmental protection measures, seasonal restrictions, or limited campground resources. Always check fire restrictions to ensure safety and avoid potential penalties.

My Redwood National Park Campground Reservations
I was fortunate enough to secure campsites in developed campgrounds within Redwood National Park and various California State Parks for all dates of my trip. These developed campgrounds all had hot showers, flush toilets, picnic tables, and fire rings (no fire restrictions if fires were maintained within the rings and put out before you went to bed). During my research, I also identified a few first-come, first-serve sites that I found appealing. I’ve documented these and plan to bring the list with me. If there’s availability at these first-come, first-serve campgrounds and they meet my expectations, I might consider forgoing my reserved site. However, doing so means I’d forfeit the payment, a factor I’ll have to weigh before deciding. Here is what I booked:
Van Damme State Park Campground
-
- Night(s): 5/13/23 | Site #: 33 | Situated in Mendocino County, I chose this site as my first resting point, splitting my drive north into two segments. Given that it’s roughly 10 hours from my starting location, this allowed me to get two-thirds of the way there. This allows me but also sufficient time to set up camp and prepare dinner that night.
Jedediah Smith Campground in Jedediah Smith Redwoods State Park
-
- Night(s): 5/14/23 | Site #: 52 | Nestled in Del Norte County, Jedidiah Smith Campground is the northernmost campground I booked. I was lucky to snag a site along the banks of the Smith River. Its prime location provides easy access to popular old-growth redwoods such as the Boy Scout Tree and Grove of the Titans in Jedediah Smith State Park. Additionally, it’s near Crescent City Bay, a surf spot on my list.
Mill Creek Campground in Del Norte Coast Redwoods State Park
-
- Night(s): 5/15/23 – 5/16/23 | Site #: 40 | Also located in Del Norte County, only about 30 miles from Jedediah Smith State Park. This campground provides easy access to trails to view coastal redwoods within Del Norte Coast Redwoods State Park, including Damnation Creek Trail. Mill Creek Campground also provides easy access to Crescent City Bay.
Gold Bluffs Beach Campground in Prairie Creek Redwoods State Park
-
- Night(s): 5/17/23 – 5/19/23 | Site #: 16 | Along the coast in Humboldt County, this beach camp allowed access to Fern Canyon hike I mentioned earlier. Gold Bluffs Beach also allowed easy access to surfing and the ocean right from my site. Additional hikes in the iconic trees in Prairie Creek Redwoods State Park were only a 15-to-20-minute drive away. The Roosevelt Elk can also be seen patrolling the beaches.
Elk Prairie Campground in Prairie Creek Redwoods State Park
-
- Night(s): 5/20/23 – 5/21/23 | Site #: 44 | A tad inland from Gold Bluffs Beach Campground but also in Prairie Creek State Park, Elk Prairie Campground has access to over 20 Redwood trails within a few minutes’ drive. The Roosevelt Elk can also be spotted within a short walk from the campsite and throughout the park.
Agate Campground in Sue-Meg State Park
-
- Night(s): 5/22/23 – 5/23/23 | Site #: 44 | Outside of the Redwood forests, this is a coastal area in Humboldt County. I am hoping for access to surfing and some coastal hikes as my trip draws to its end.

My Redwood National Park Campground Itinerary
Heading into the trip I had a pretty loose itinerary. The most ridged parts of the trip were the driving days, the days I needed to switch camps, and I had a hike planned of Tall Tree Grove which required a permit for a specific day. Other than that, I had hikes and activities that I’d like to do but didn’t have to happen on that day or at all.
In order to accomplish my goal of experimenting with camp cooking, I similarly planned many meals in advance. Based I previous trips, I concluded I could fit about 10 days’ worth of meals in it. Should get me through most of my trip, however, I will be passing through towns where I can restock if I need to.
Here are my daily itinerary and dinner plans.
Daily Itinerary
- 5/13/23
- Drive to Van Damme State Park Campground
- Dinner: Ribeye w/ chimichurri, broccolini, sourdough bread
- 5/14/23
- Drive to Pelican Beach for Lunch
- Drive to Jedediah Smith Redwoods State Park
- Check-in to Jedediah Smith Campground
- Flyfish from the banks of the Smith River
- 5/15/23
- Hike Fern Falls and Boy Scout Tree Trail
- Hike Grove of the Titans
- Drive to Del Norte Coastal Redwoods State Park
- Check-in to Mill Creek Campground
- 5/16/23
- Hike in the coastal redwoods on Damnation Creek Trail
- Hike on the Coastal Trail
- 5/17/23
- Surf Crescent City Bay
- Drive to Prairie Creek Redwoods State Park
- Check-in to Gold Bluffs Beach Campground
- 5/18/23
- Morning Surf
- Hike the Miners’ Ridge and James Irvine Loop to see Fern Canyon
- 5/19/23
- Morning Surf
- Visit Prairie Creek Redwoods State Park visitors center to get hike recommendations for the park.
- 5/20/23
- Morning Surf
- Choose another hike or two in Prairie Creek Redwoods State Park
- Check-in to Elk Prairie Campground
- 5/21/23
- Hike Tall Trees Grove
- Find a viewing location to see the Roosevelt Elk
- 5/22/23
- Drive to Sue-Meg State Park
- Stop at the visitor center to learn about local hikes and pick one for the day
- Check-In to Agate Campground
- 5/23/23
- Spend the morning looking for and surfing a spot in the area
- Hike from the recommendations from the visitor center
- 5/24/23
- Drive Home
- Drive the Avenue of the Giants, a scenic drive through old-growth redwoods
- Sleep in my own bed

Daily Dinners
- 5/13/23: Ribeye w/ chimichurri, broccolini, sourdough bread
- 5/14/23: Chili w/ cheddar cheese & spicy skillet cornbread
- 5/15/23: Sourdough Peetza (my last name is Peet, hence Peetza)
- 5/16/23: Ramen
- 5/17/23: Pork Chops, potatoes, & salad
- 5/18/23: Chicken thighs & left-over Veggies
- 5/19/23: Rice Noodle Stir-Fry
- 5/20/23: Leftovers
- 5/21/23: Leftovers or do a grocery run
- 5/22/23: Leftovers or do a grocery run
- 5/23/23: Anything left in the cooler
- 5/24/23: Something… Anything that’s not from my cooler!!
Gear Packing And Food Planning
The first step in my packing preparation is usually to make a spreadsheet of all the items I want to bring. Over time I have made specific templates for different types of adventures. In addition, I usually start organizing and packing about a week leading up to the trip so I can make sure I account for everything on my list. Therefore, I alleviate the stress of last-minute packing (not to mention when I pack at the last minute, I tend to overpack!) with the added benefit that I also enjoy the satisfaction of checking off items as I pack. As a result of these planning habits came the inspiration for the tool I am going to be providing through this website.
For this trip to the giant redwoods, I used my car camping template. The template is broken into two main categories with a few sub-categories underneath each.

Don’t Leave Home Without
These are the essential items that I will pack every car camping trip. The quantities may vary from trip to trip. For example, if this trip is longer than the last you may need more fuel canisters or if you’re adding more people you may need another sleeping bag. I have broken this down into 3 sub-categories:
- Gear Essentials – Must have gear, like a tent, sleeping bag, sleeping pad, etc.
- Camp Kitchen Essentials – All things I need to be successful with cooking good meals after a day of adventuring.
- Miscellaneous – All else that I feel is a must-have for car camping, that doesn’t fit under the other two categories.
Trip Specific Items
Items that vary based on the location, time of year, length, and activities planned for the adventure. I have also broken this down into 3 sub-categories:
- Optional Gear – Running list of all my other gear that is trip-specific. This includes things like a hammock, fly rod, surfboard, etc. Given I have a diverse set of activities planned, I therefore need to pack a lot of gear from my optional gear.
- Clothes – The types of clothes you pack will vary by climate, so make sure to always check the historical weather for your destination based on the time of your trip.
- Food – As I mentioned earlier, a goal of mine for this trip was camp cooking, so I chose to make a list of meals and items I would need to make my preplanned meals. You can simplify this by bringing dehydrated meals or more simple meals to cook.
My Full Pack List
Here is my full pack list for my trip to Redwood National Park Campgrounds. Once my tool is ready I will also convert it to that format and share it. Remember this list suits my needs and is what I decided I needed to get the most out of my trip to Redwood National Park:

New Gear Alert
For my trip to Redwood National Park campgrounds, I purchased a few new Items. Here are the ones I’m most excited to try out:
REI Wonderland 4 Tent
For years I had been using my backpacking tent for both car camping and backpacking. While it does the trick for both, I decided it was time to invest in a bigger tent for sleeping amongst the giant redwoods. I would be spending 11 nights in a tent and felt I deserved something more spacious for this trip. Especially if there were days of inclement weather and I needed to spend more time in my tent. Remember any time you buy a new tent, to test the setup at home before you go.
Car Camping Tent
REI Wonderland 4 Person Tent


Spacious
Easy Setup
Good Ventilation
Durability

Expensive
No Vestibule
Not Great in High Winds
Price: $499.99
Specs
Sleeps – 4 People
Dimensions (L x W x H) – 100 x 100 x 75 in.
Weight – 21 lbs 11 oz
Additional Models – 6 person
Detailed Review
REI’s Wonderland 4 tent is my choice for camping enthusiasts seeking a spacious and hassle-free camping experience. With its spacious interior, it’s user-friendly making it easy to set up with just one person, and its built to last. Its large doors and windows allow for excellent airflow. By adjusting its window openings, the Wonderland allows the flexibility to have the tent feel open or allow for privacy without sacrificing the ventilation. While The Wonderland is on the expensive side, this tent effortlessly combines comfort, quality, and reliability to provide great value for your camping adventures!
Spacious - With a peak height of 75 inches, the 4P Wonderland it’s tall enough to change and move around comfortably while standing up if you’re 6’ 3” or shorter. The 100×100-inch floor dimensions give you plenty of room for a large camping mattress (up to queen size!!) while still having room for all your gear. On a rainy day during my last outing, I was able to comfortably fit my camp chair in the tent so I could read inside, and out of the elements. The tent’s walls rise almost straight up, ensuring optimal space right to the edges without having to bend over. While I have mostly used the tent solo, the Wonderland 4 is a good size for 2 or 3 adults or a small family with kids. There is also a 6-person model available for those who need more space.
Easy Setup - With an easy-to-understand color-coding system for the poles and pole sets, setting up the Wonderland tent is straightforward and quick, even for one person. Being 5’7″, the only struggle I have is getting the fly over the top of the tent. The triangular hubs on the center poles may be different from what you might see on other dome tents, but after reading the instructions that are sewn into the bag, I found them easy to work with. After a few setups of the structure, the process will become intuitive.
Good Ventilation - Maintaining a fresh, dry, and cozy environment inside the tent is crucial, regardless of the weather outside. The Wonderland boasts an expansive mesh ceiling and generous vents throughout, ensuring top-notch ventilation. What’s more, the unique curved design allows for the triangular side windows to remain open even with the rainfly attached. Even in a downpour with everything zipped up, the upper mesh ports ensure continuous air movement. Thanks to these design elements, the Wonderland tent is versatile and easily adapts to different settings and climates.
Durability - With Aluminum tent poles and high-quality fabrics the Wonderland is durable enough to last for years of adventure. With proper care and given the materials floor, rainfly, mesh, and hardware are a step up in the quality of budget tents, and the Wonderland should and is expected to hold up well with regular use.
Expensive - If you are new to camping or don’t think you will go regularly, Wonderland may not be a good value for you. There are many tents that come in well under the $499.99 price point. That said, I find the value of the Wonderland Tent to be worth the investment given its quality and the spaciousness and living comfort of the the barn-style design.
No Vestibule - While not a huge con, the Wonderland could take a step up with an option to have an enclosed vestibule. This option would help keep gear out of inclement weather and out of sight when we’re away from camp. While dry gear can easily be stored inside the spacious main part of the tent, sometimes that gear brings in dirt and grit you’d like to keep outside. Wonderland has awnings over both doors to keep the doorways drip-free when it rains, so even extending those may help provide a solution.
Not Great in High Winds - Generally a negative to most high-profile tents, like the Wonderland, is being prone to wind damage or just being noisy with high winds. While the Wonderland is built to be durable and is quite stable when properly staked downs and guy lines set, it may not be as ideal for exposed environments with high winds like lower profile tents. The design of the Wonderland is more than adequate for sheltered locations (think wooded or forested campgrounds) that most people camp in.
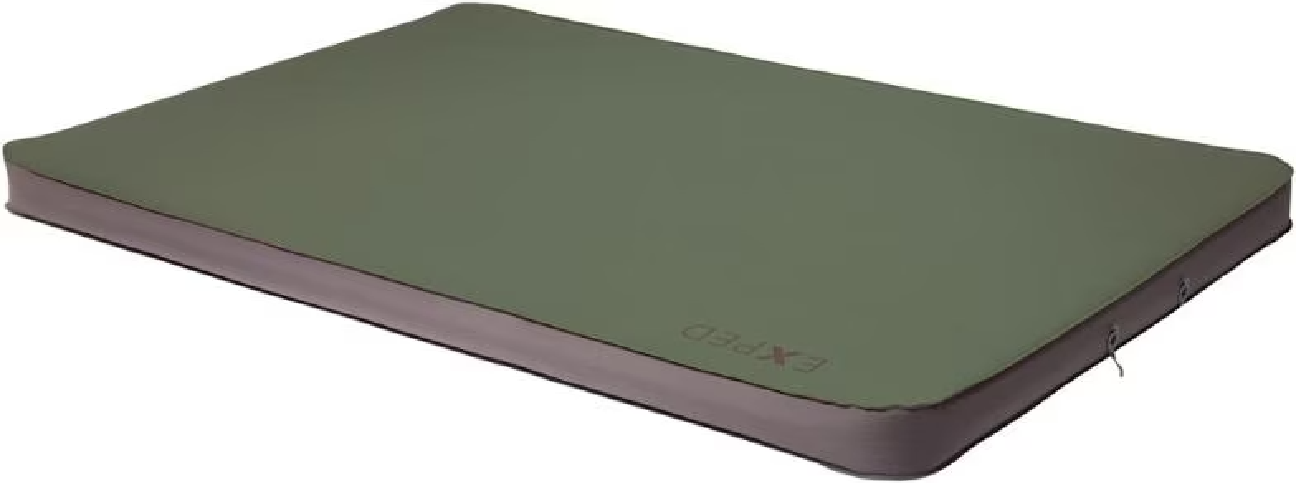
Exped MegaMat Duo 10 Sleeping Pad
Like my tent, I had been using my backpacking sleeping pad for car camping trips. Therefore, I decided to upgrade to a better sleeping pad as well. I found my Exped on REI garage, where I was able to get a good deal on a lightly used pad, I saved about $30 by buying a used one. Might be most excited about this new item, hoping it helps me get a better night’s rest to tackle my daily adventures.
Sleeping Pad
Exped MegaMat Duo 10 Sleeping Pad
Warmth
Comfort
Cumbersome
Price
Price: $349.95
Specs
R-Value – 8.1
Packed Size – 11 x 22 inches
Inflated – 72 x 41 x 4 inches
Weight – 7 lbs 8 oz
Sleeping Capacity – 2-person
Additional Models – Long Wide Double
Detailed Review
When it comes to outdoor comfort, the Exped MegaMat Duo 10 Sleeping Pad is my go-to choice. I’m continually impressed by the exceptional insulation it offers, keeping me warm on those cooler nights. When fully inflated my pad, size Medium Double, not only easily fits in my REI Wonderland 4 tent but also in the back of my Subaru Outback for a night in the car. The face fabric on top adds another layer of comfort, feeling soft and plush to the touch. However, it’s worth noting that its larger size can be a tad cumbersome when packing and difficult to deflate. Additionally, these sleeping pads run on the expensive side. But for me, the warmth, comfort, and versatility trade-off is well worth these minor drawbacks.
Warmth - The warmth and insulation of the Exped MegaMat Duo 10 Sleeping Pad truly set it apart. Boasting an impressive R-value of 8.1, it's designed to keep you snug in cold conditions. For those unfamiliar, the R-value measures a material's resistance to heat flow, with a higher number indicating better insulating properties. This means with the MegaMat, you're not only getting comfort, but also the assurance of warmth in chilly terrains.
Comfort - The comfort factor of the Exped MegaMat Duo 10 Sleeping Pad is undeniably one of my favorite things about it. Crafted with high-quality materials, the sleeping pad incorporates a plush, stretch tricot top that offers a soft and cozy sleeping surface. Furthermore, its self-inflating foam core adapts to the contours of your body, ensuring a restful night's sleep, even on uneven terrains. I tend to inflate the pad to about 85%, this provides me a balance of firmness but allows my body to sink in a little bit to alleviate some of the pressure points (like in the shoulders if I am sleeping on my side). Add to this the pad's generous thickness, and you have a sleeping surface that rivals many home mattresses, ensuring you wake up refreshed and ready for the day's adventures.
Cumbersome - While the Exped MegaMat Duo 10 Sleeping Pad offers top-notch comfort and warmth, it does come with a bit of a trade-off in terms of portability. Weighing over 7 pounds, it's not the lightest option on the market, which means you'll probably not want to carry it further than from your car to your tent. Additionally, deflating the pad can be a bit of a chore. Unlike some other pads that can be quickly deflated and packed away, the MegaMat Duo requires a bit more time and effort to get all the air out, making the packing process longer.
Price - The Exped MegaMat Duo 10 Sleeping Pad undoubtedly offers premium features, but with that comes a premium price tag. When compared to other sleeping pads on the market, the MegaMat Duo's cost can be a little steep for some budgets. While you're certainly getting top-tier comfort and insulation, there are other pads out there that offer decent performance at a lower cost. It's always a balancing act between quality and affordability, and for some, the MegaMat Duo might feel like a splurge. Before committing, it's worth exploring other options to ensure you're getting the best value for your money.
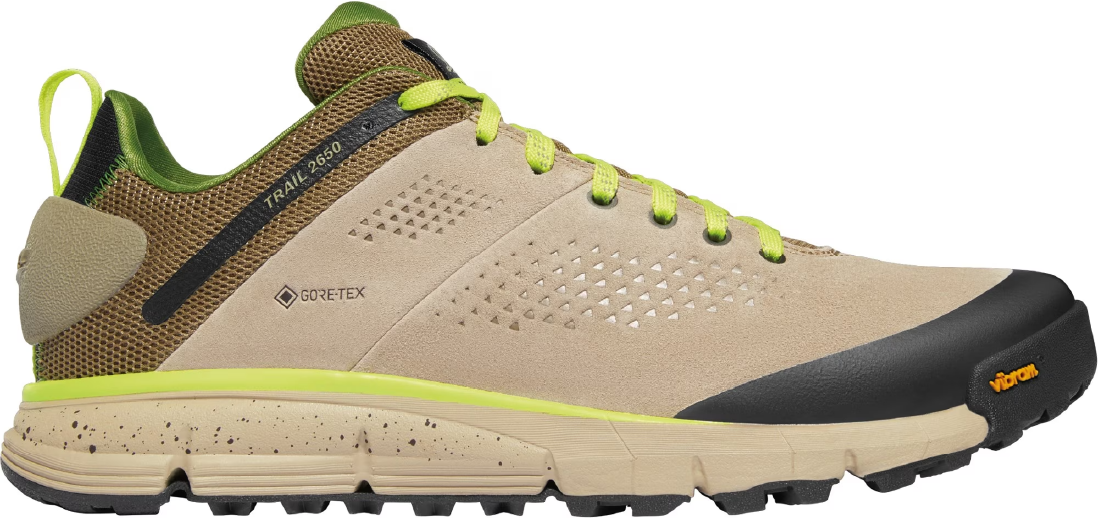
Danner Trail 2650 GTX Hiking Shoes
My old trail shoes had seen better days. With lots of hiking planned for this trip, I needed a new pair ready for the miles I was going to put on. The hikes I had planned didn’t have a ton of elevation and I was just going to be day hiking, so carrying minimal weight, so a pair of good hiking shoes was all I needed. These shoes felt great in the store, looked stylish so I could wear them around town, and low and behold the last pair of them at my local REI was in my size and on sale (about $50 off!!). I highly recommend wearing hiking shoes a few times before going on a trip. Not only will this break them in but it will help determine if it’s a good fit for your foot.
What's on my feet?
Danner Trail 2650 GTX Hiking Shoes
Comfort
Light Weight
Water Proofing
Support
Price: $189.95
Specs
Footwear Height – Ankle
Waterproof – Yes w/ GORE-TEX waterproof/breathable membrane
Weight – 1lb 5oz.
Color – Tan/Meadow Green
Additional Models – Comes in two other colors and there is a non-waterproof model
Detailed Review
Great mid-range hiking shoe! With a roomy fit, lightweight, and EXO Heel System to cradle the heel, I have found this shoe to be very comfortable on my feet. While I wouldn’t take this on a backpacking trip, these have become my go-to hikers for all my day hikes. With a casual and more stylish appearance, they also work well for walks around town or exploring vacations!
Comfort - The shoe immediately stands out when it comes to comfort. From the moment I slipped them on, my feet felt cradled and secure with EXO Heel System to cradle the heel. And the breathable design? A game-changer. It ensures your feet stay cool, even during those long hikes. No more sweaty feet or discomfort. It's clear that Danner really put thought into crafting a shoe that molds to your foot, making each step on the trail feel like a breeze.
Light Weight - At just 1 lb. 5 oz. per pair, these may be some of the lightest I've ever owned. These shoes almost feel like wearing tennis shoes but with superior traction. Less weight means less strain on your legs, letting you trek longer and with more energy.
Water Proofing - With a waterproof and breathable GORETEX membrane, these shoes keep water out! Like most shoes in this category (ankle height), these shoes have a lower flood height, at about 2.75 inches. You should try to avoid deep puddles and be careful around the edges of bodies of water. Anything below that flood height, the water stays where it belongs... outside the shoe!
Support - While I have yet to experience any pain or soreness in my feet after a day of hiking in these shoes, the lightweight design comes at the sacrifice of some rigidity in the shoe. Additionally, like most ankle-height hikers, the is minimal ankle support so if you have a tendency to roll your akles you may want to look into shoes with more height. While I wouldn't recommend these shoes for carrying heavy loads or long backpacking trips, I've had zero complaints on support for the lightweight day hikes I've worn them on.
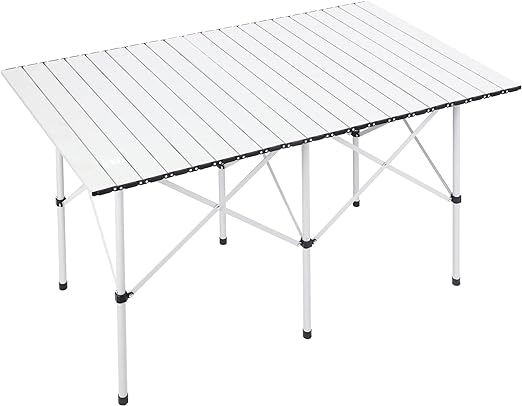
Ever Advanced Roll Up Camping Table
While all my sites at Redwood National Park Campgrounds had picnic tables included you never know what the quality of those tables will be. This table packed up nicely and based on reviews was easy to set up. I decided to buy it and bring it along in case the picnic tables at the campsites were either too dirty or I just wanted some extra space to set up my camp kitchen.
Roll-Up Camping Table
Ever Advanced Roll Up Camping Table
Easy Set-Up
Portability
Sturdiness
Static Leg Height
Price: $84.99
Specs
Packed Size – 28.0″L x7.9″W x 5.4″H
Open Size- 45.9″L x 29.1″W x 29.1″H
Weight – 17.9 lbs
Seating Capacity – 4 – 6 Persons
Maximum Weight Recommendation – 66 lbs
Detailed Review
The Ever Advanced Roll Up Camping Table serves as an excellent outdoor companion, especially for those who cherish convenience and durability. One of its standout features is its lightweight design, making transportation and setup a breeze. Catering to medium-sized groups, it can comfortably accommodate 4-6 persons, ensuring everyone has enough space for their camping essentials. I tend to use this as a cook station set up, to keep any campground-provided picnic tables free. Crafted with robust aluminum, it promises longevity and resilience against the elements. My biggest complaint is the absence of adjustable leg heights can be a limitation in terrains that aren’t entirely level, a feature found in some competing products.
Easy Set-Up - Its intuitive design ensures that you barely need a manual and no special tools to get it ready for use. Just a few simple steps, and within a couple of minutes, your campsite has a sturdy table ready for a camp kitchen, meals, games, or planning the next day's adventures. Whether you're an experienced camper or a newbie, this table eliminates the usual fuss, allowing you to focus more on enjoying your outdoor experience.
Portability - The compact folded design and carrying case allow for this table to be packed easily in your car for camping, beach days, or picnics. It weighs almost 18 lbs so you will not be carrying it into the backcountry but it is light enough to move around the campsite without a fuss and easily get in and out of your car.
Sturdiness - Rated to hold up to 66 lbs, this table can withstand the weight of any of the tasks it's designed for. The aluminum tabletop is not just lightweight, but also highly durable, ensuring that it won't easily succumb to the wear and tear of outdoor use. Complementing this, the strong steel base provides a solid foundation, allowing the table to maintain stability for a variety of uses. Whether you're setting up a camp kitchen, playing a game with your campmates, or just a spread of your favorite outdoor meals, you can trust this table to hold up.
Static Leg Height - One drawback of this table is the lack of adjustable leg heights. Being able to tweak the leg height can stabilize it on uneven terrain, something that some competing tables offer. Plus, there have been times when I've wished for the ability to elevate the table slightly, making my camp kitchen setup feel just a bit more ergonomic and user-friendly.
With the trip planned, the best Redwood National Park campgrounds booked, and gear and food packed, I am ready to get lost amongst the tall trees in the redwood forests. Stay tuned for my review of the trip!!


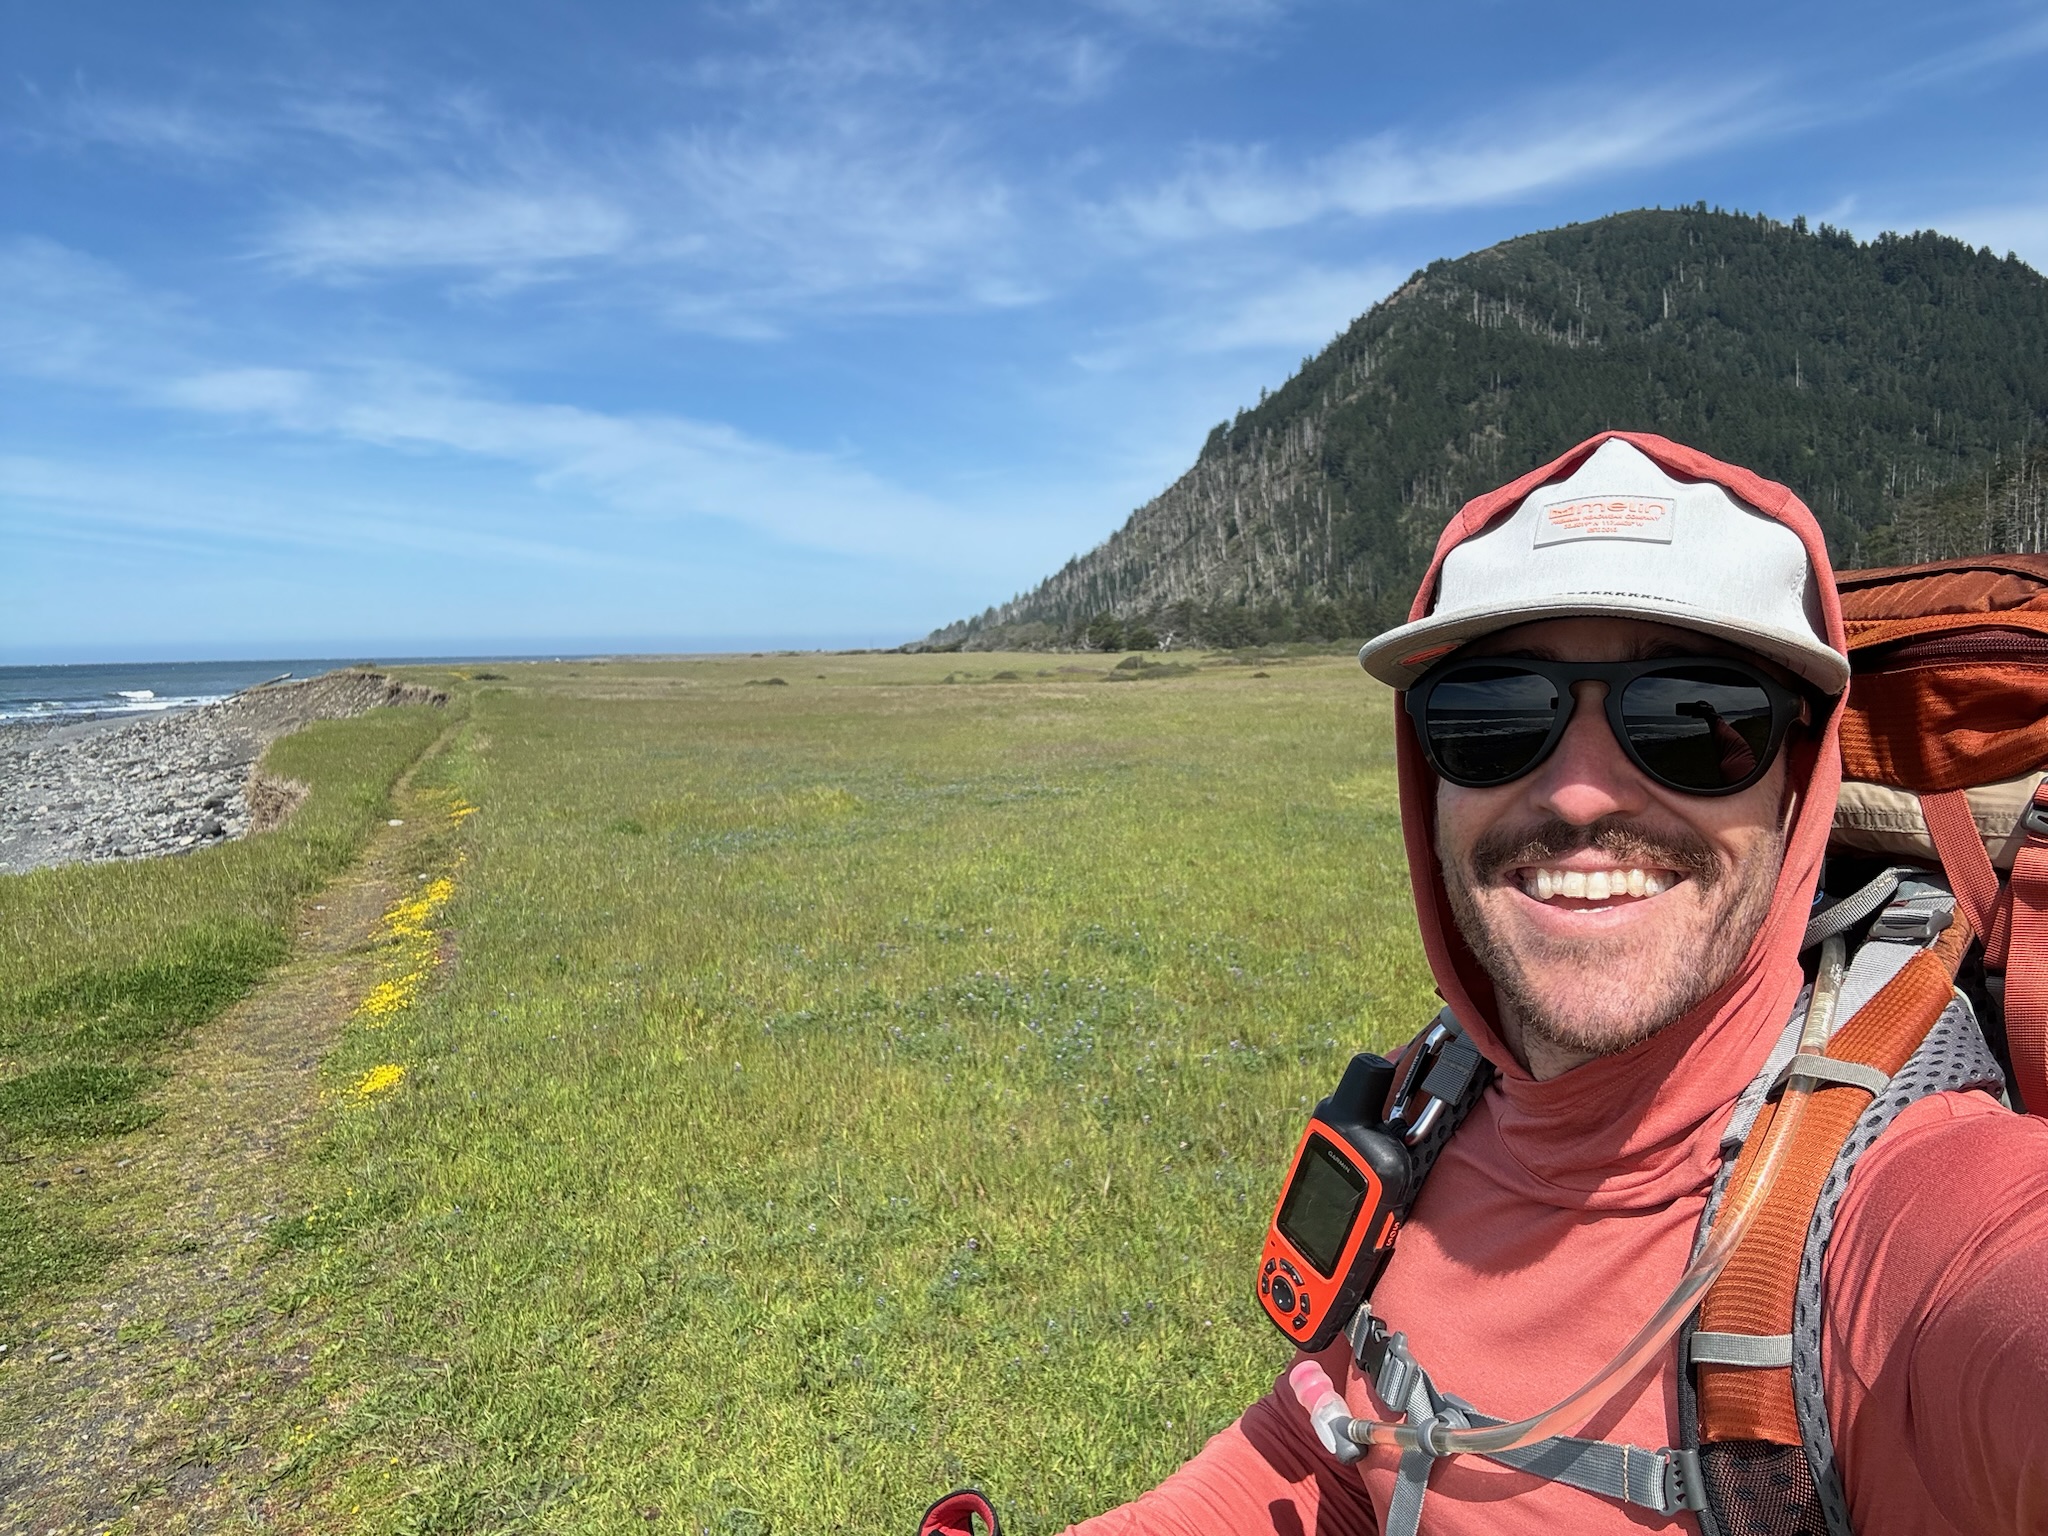
Hi, I’m Dave — a laid-back adventure enthusiast based in Southern California with a deep love for the outdoors and all the unexpected joys it brings. Through Plan | Pack | Discover, I share my passion for hiking, camping, surfing, and backpacking — and help you get ready for your own adventures, too.